| Widget Connector | ||||||||||
|---|---|---|---|---|---|---|---|---|---|---|
|
| Info |
|---|
See this use-case live on our sandbox environment here: https://radbee-sandbox.atlassian.net/wiki/spaces/~209251919/pages/148635718/2021+Q3 |
I bet you’ve experienced this common problem: the business teams want to launch all their high priority items, but there’s a limit to how much the Dev and QA teams can deliver. It always seems like there are more requests than can fit in a single work cycle. When the demand exceeds the supply, you need to analyze the request list and mix and match potential Jira issues based on priority and available capacity. I performed this prioritization exercise for years and it was always difficult to communicate. I needed to present leadership with multiple possible options. For example, the teams can deliver project A and project B OR the teams can deliver project C, fix some bugs, and chip away at the technical debt backlog. We could do one option or the other, but not both at the same time. It was challenging to show stakeholders the options so they could make smart business decisions.
With Jira Snapshots for Confluence you can display different release package proposals for stakeholders to choose from. Use multiple macros and the macro’s “levels” feature to create a hierarchy for a holistic view of epics, tasks, and sub-tasks grouped together in one list.

| Info |
|---|
Use case by Rachel Wright The author of Jira Strategy Admin Workbook |
About Levels
Use the levels feature in Jira Snapshots for Confluence to show issue hierarchy in a way that Jira can’t. Epics often include related parent issues and issues often include child sub-tasks. That’s three total “levels” of related information. Use the first macro level to show epics, use a second level to show issues in those epics, and use a third level to show sub-tasks in those issues. The effect is a nice view of cascading dependencies in one issue list.
The data in each level always depends on the data from the level above. Think of the levels as different “sub queries”. Use parameters (variables) to dynamically retrieve the desired issues. For example, instead of a hard coded JQL query like “parent = PROJ-1”, use “parent = $key” to retrieve sub-tasks from issues in the previous level. Read more about levels at Configure Multi-Level Jira Snapshots
| Anchor | ||||
|---|---|---|---|---|
|
| Expand | ||
|---|---|---|
| ||
 |
How to Do It:
Log in to Confluence and create a new page for for prioritization and strategic planning.
Insert a Jira Snapshots macro for the first release package option.
In the “Edit Jira Snapshots Macro” overlay use multiple levels to display epics, issues in the epics, and any sub-task issues.

By default, each Jira snapshot macro includes one level. In the first level, enter a title in the “Level title” field.
Like: “Projects” to represent epics and any stand-alone issues
Enter a query in the “Search JQL” field to limit the scope of issues.
In the screenshot example, this proposal is to deliver one epic (PROJ-1) and three stand-alone issues (DEVT-54, DEVT-55, DEVT-60).
So the Search JQL query looks like this:
Code Block key in (PROJ-1, DEVT-54, DEVT-55, DEVT-60)
In the “Add fields to display” field, select the desired columns.
Like: Key, Summary, Components, Original Estimate
click the “Add new level” button on the left to add a second level.
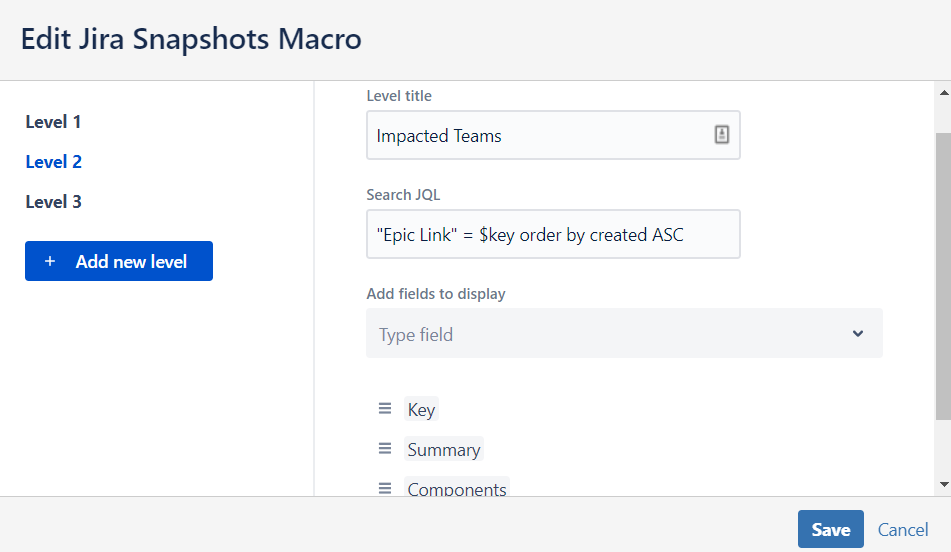
Add a level title to represent issues in the epics.
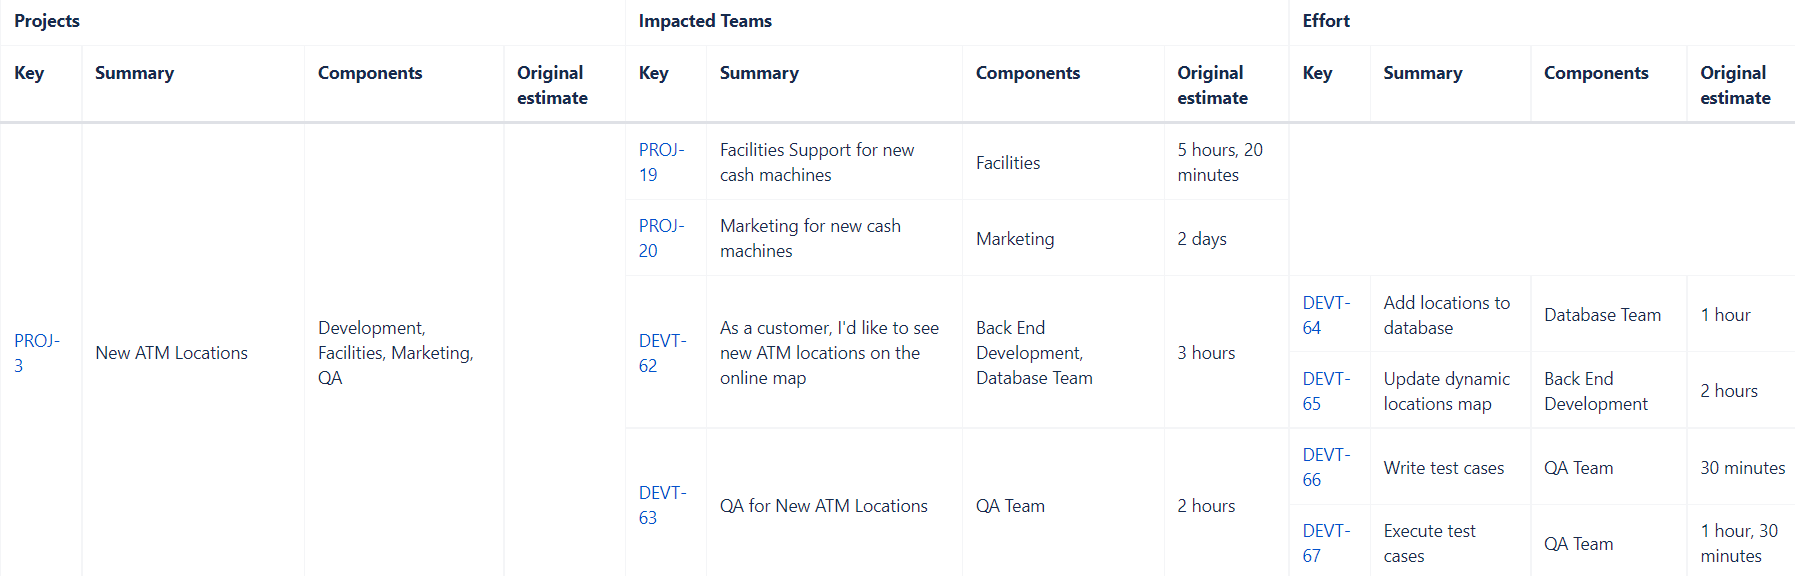
Like: “Impacted Teams”
In the screenshot example, the work is divided by team. Teams are signified by the components field and estimates are entered for all issues.
Enter a query in the “Search JQL” field to limit the scope of issues based on the level above. Use a parameter (variable) to achieve the cascading effect.
Like:
Code Block "Epic Link" = $key order by created ASC
In the “Add fields to display” field, select the desired columns.
Like: Key, Summary, Components, Original Estimate
Finally, add a third level for related sub-tasks.
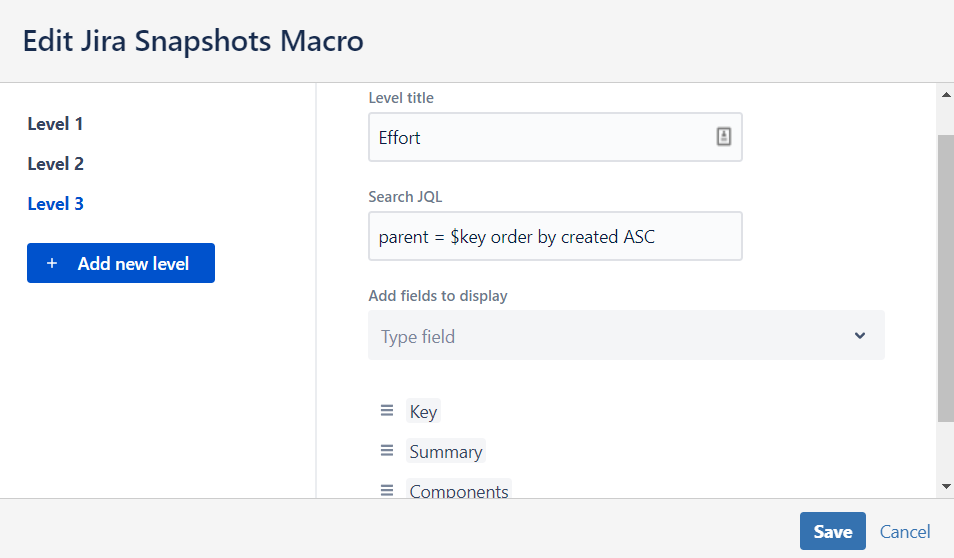
Add a level title for the sub-task issues.
Like: “Effort”
In the screenshot example, work for each team is further broken down into sub-tasks to represent individual actions to perform.
Enter a query in the “Search JQL” field to limit the scope of issues based on the level above. Use a parameter (variable) to achieve the cascading effect.
Like:
Code Block parent = $key order by created ASC
In the “Add fields to display” field, select the desired columns.
Like: Key, Summary, Components, Original Estimate
After the three levels are added, click the “Save” button at the bottom right to complete the macro configuration.
Insert and configure another Jira Snapshots macro for any additional proposal options.
Click the “Publish” button at the top right of the Confluence page.
Finally, click the “Create controlled snapshot” buttons, to generate a static list of issues.
The Finished Result
| Expand | ||
|---|---|---|
| ||
|
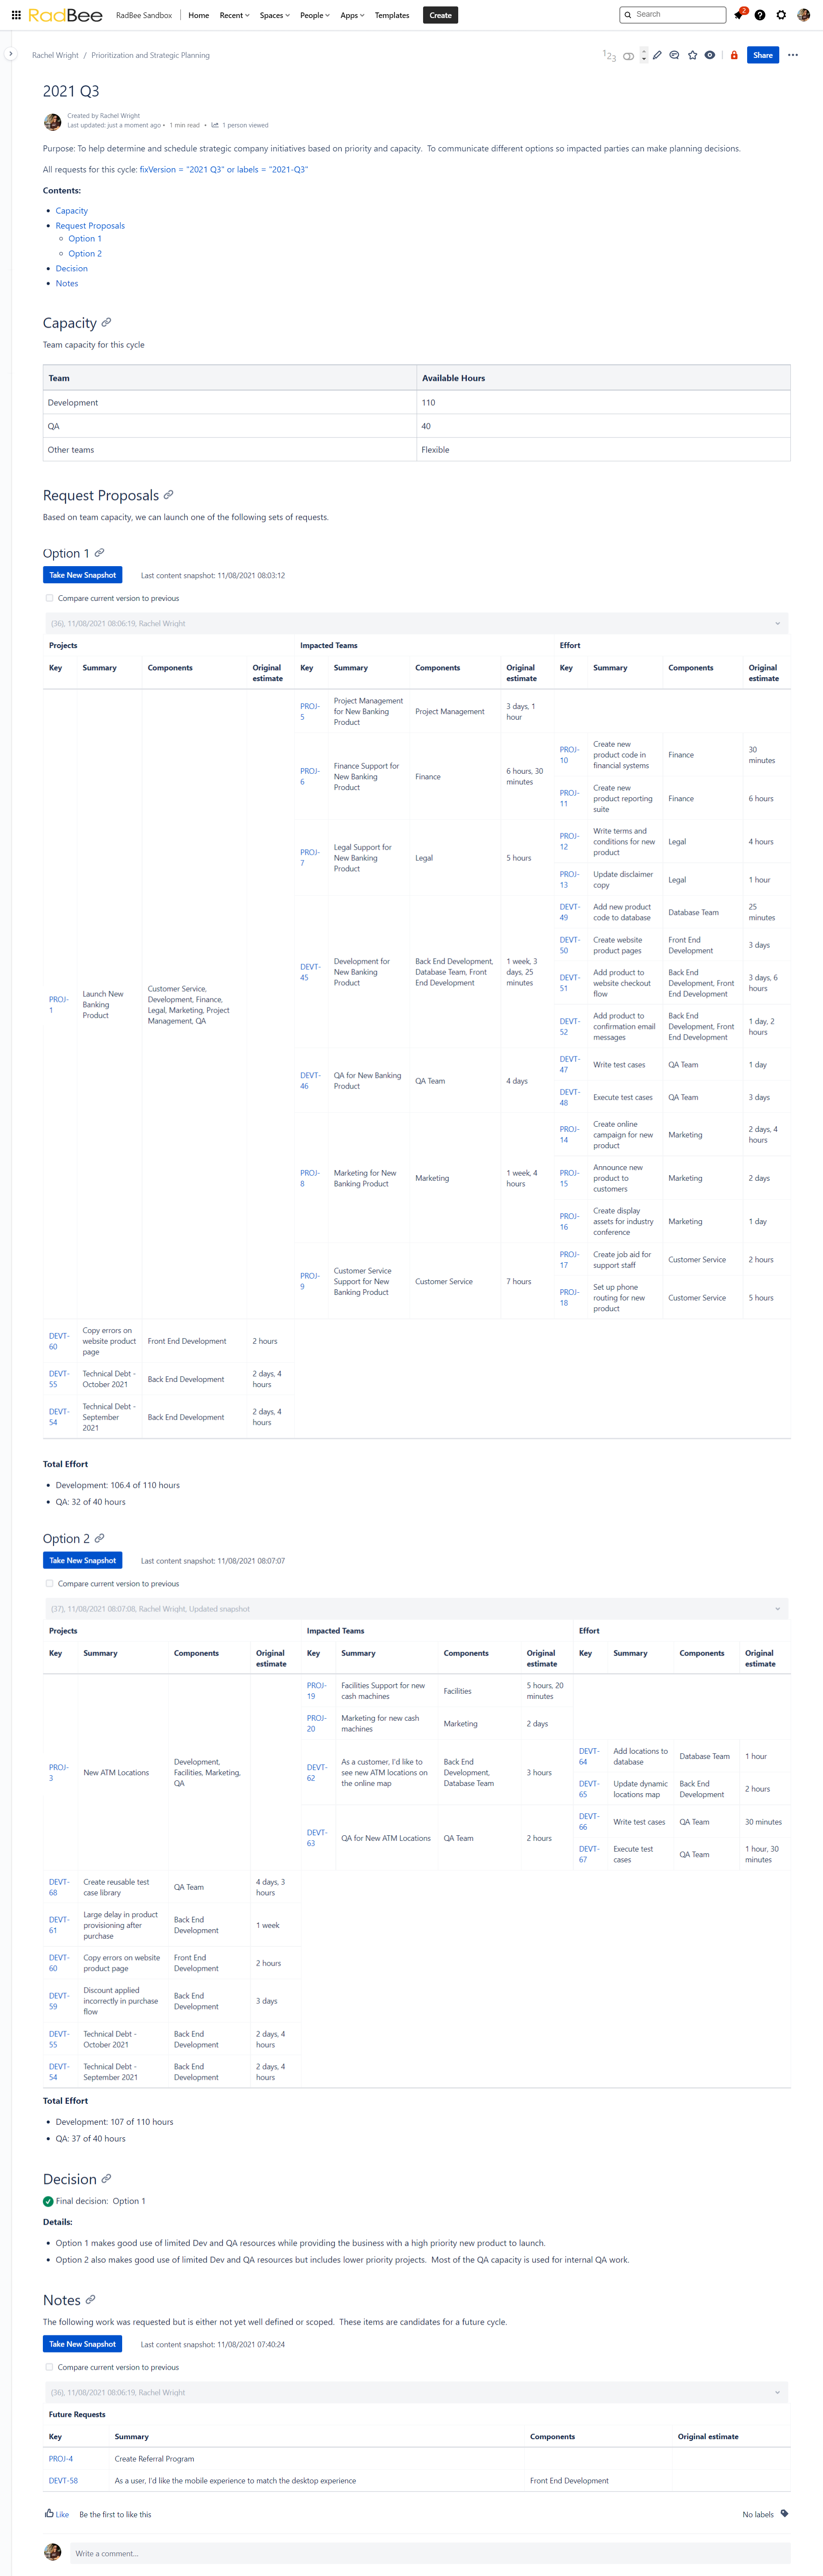
The example Confluence page shows the capacity for each impacted team, two request proposals powered by two macros, the final decision, and another Jira Snapshots macro showing future issues to consider for the next work cycle.
Need to change the issue list or display different information? Simply edit the macro details and click the “Update” button on the Confluence page to take new snapshots.
Now you can offer multiple release package options for stakeholders to choose from. Don’t forget to record the decision and any additional notes in Confluence.
| Tip |
|---|
Tips
|