| Info |
|---|
See this use-case live on our sandbox environment here: https://radbee-sandbox.atlassian.net/wiki/spaces/GALACTIKA/pages/73466044/Galactika+functional+specification+and+traceability+to+tests |
| Info |
|---|
This is a followup use case to Release |
For a quick recap, Jira Snapshots dramatically reduces the time you need to spend on release documentation:
Jira data on Confluence page is static and time stamped.
Two, three and more traceability matrices are easy to set up.
You can compare between different versions of the data.
In Confluences' page history: each new snapshot creates a new page version.
Snapshots are included Confluence exports (Word and PDF)
Here, we’ll show how to include Xray test management in the Snapshot.
![]() To setup the integration with Xray checkout Integration: Configuring a Link with Xray Test Management
To setup the integration with Xray checkout Integration: Configuring a Link with Xray Test Management
![]() For details of what is supported by this integration checkout Integration with Xray Test Management for Jira
For details of what is supported by this integration checkout Integration with Xray Test Management for Jira
.jpg?version=1&modificationDate=1626972895565&cacheVersion=1&api=v2&width=544)
| Info |
|---|
Use case by Rina Nir _RadBee . RadBee’s CEO “We cannot remove the burden of regulatory compliance, but we surely can rid teams from the waste of time” |
| Tip | ||||
|---|---|---|---|---|
Tips
|
Prerequisites
This use case assumes that:
Your traceability is built on Jira issues of issue type ‘Functional specification’ (custom issue type) being tested by issues of type ‘Test’ (which is an issue type installed by the Xray Test Management App)
You are using Xray Test Management, and that Xray test issues are linked to Functional specification issue via a ‘is test by’ link. You can adapt the link name or the issue type name to what you have.
Here is how to do it
Login to Confluence and create a new page. Add to it all the “regular text” sections, like ‘Purpose’, 'Scope':

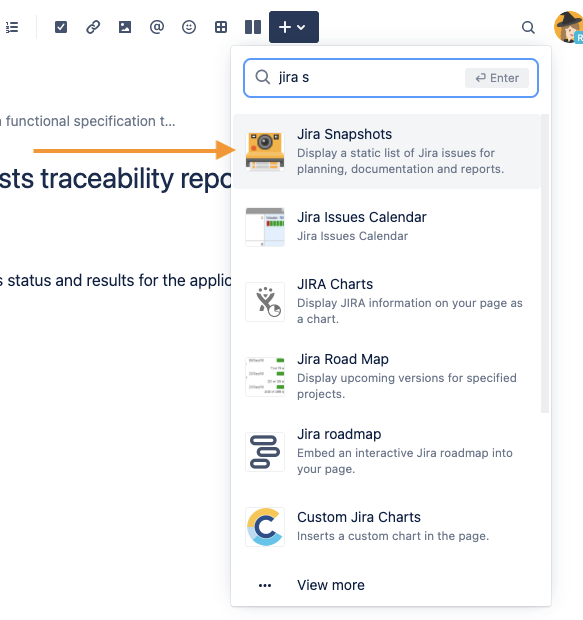
In the top editor toolbar, click the “+” icon and type “jira s” in the search bar. Then, select the “Jira snapshots” macro.
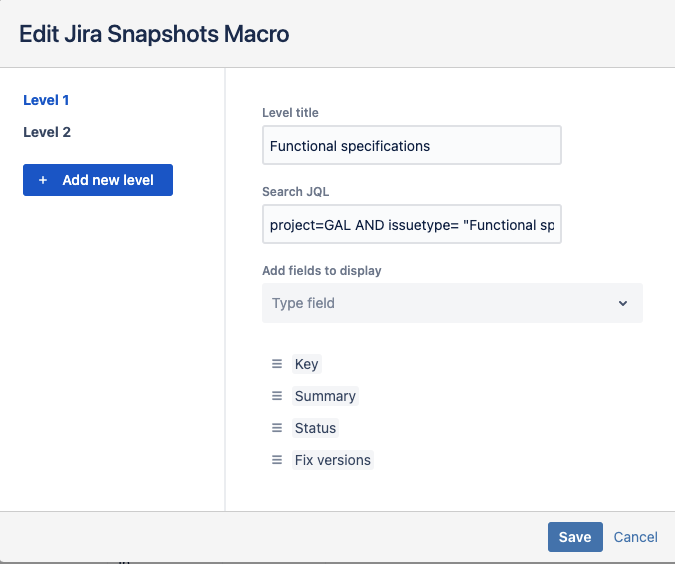
In the “Edit Jira Snapshots Macro” overlay:
Enter a title in the “Level title” field to represent the first level or “list” of Jira issues.
Enter a query in the “Search JQL” field to limit the scope of issues, like:
Code Block project = GAL AND issuetype = "Functional specification" AND fixVersion = V1.0 order by 'Requirement type' ASC
In the “Add fields to display” field, select the desired columns.
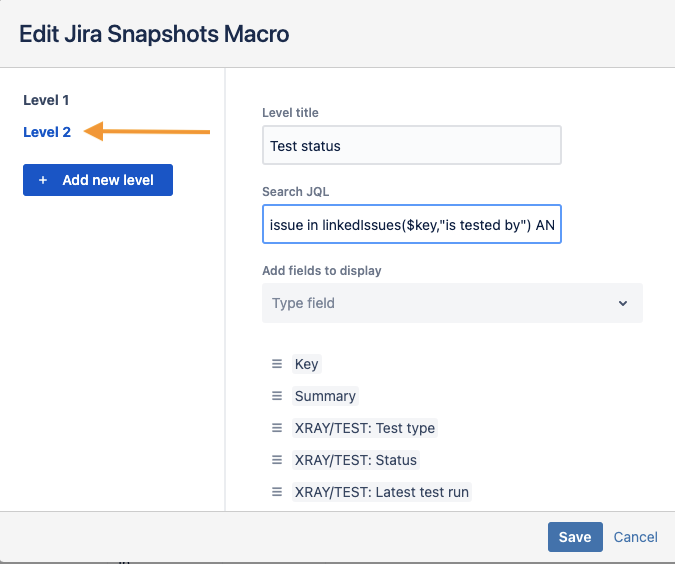
When configuring the traceability report, you’ll need to select: “+ Add new level”
Enter a title for the 2nd level
Enter a query in the “Search JQL” field. This time it needs to link with Level 1, like:
Code Block issue in linkedIssues($key,"is tested by") AND fixVersion = V1.0 order by key ASC
In the “Add fields to display” field, select the desired columns.

Click the “Insert” button at the bottom right to complete the macro’s configuration.
Click the “Publish” button at the top right of the page.

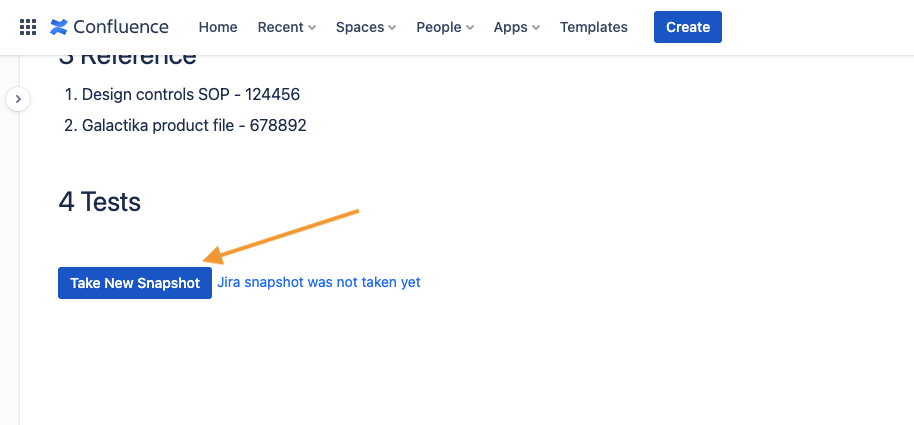
Finally, click the “Create controlled snapshot” button to generate a static list of issues.
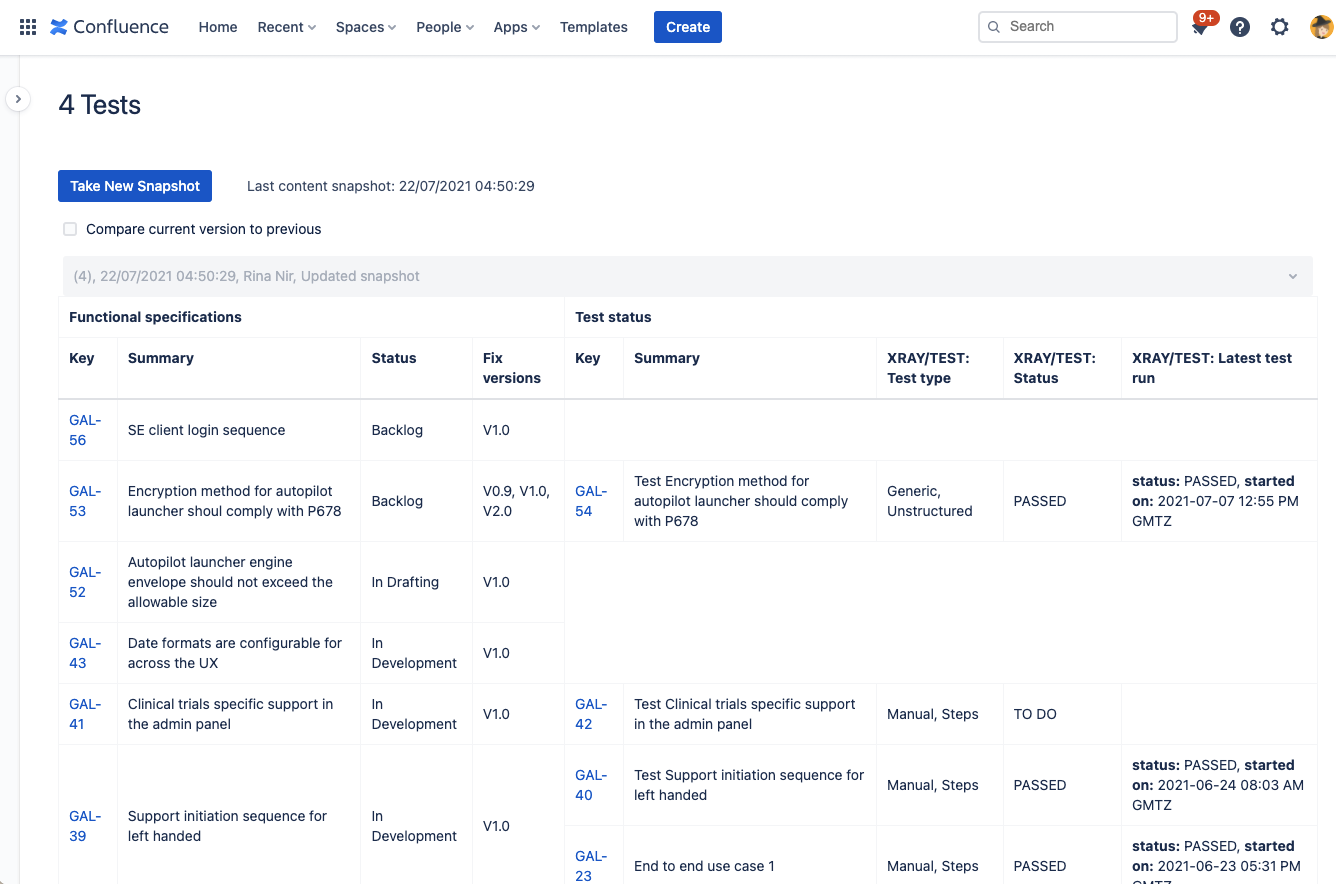
Here’s the finished result.
Need to change the issue list or display different information? Simply edit the macro details and click the “Update” button, on the Confluence page, to take a new snapshot.